Showing posts with label Tutorial. Show all posts

Tuesday, March 20, 2012

Dahlia Flower Tutorial

I made some cards as part of my project for the Pages From the Heart design team. On one of the cards I added a folded Dahlia flower. 
 
Party Card with a Dahlia Flower

Here is what you will need:

Double-sided paper or cardstock
Circle punch
Xyron or adhesive of choice

1. You will need to punch 8-9 circles for your petals (depending on how accurate or not your folding is) and one circle for your base. I like to use a circle that is a little larger for the base to give me a larger sticky surface.


2. Cover the base circle with adhesive. I have found that the best method for this flower is by using a Xyron, although covering the circle with a tape runner will work as well.


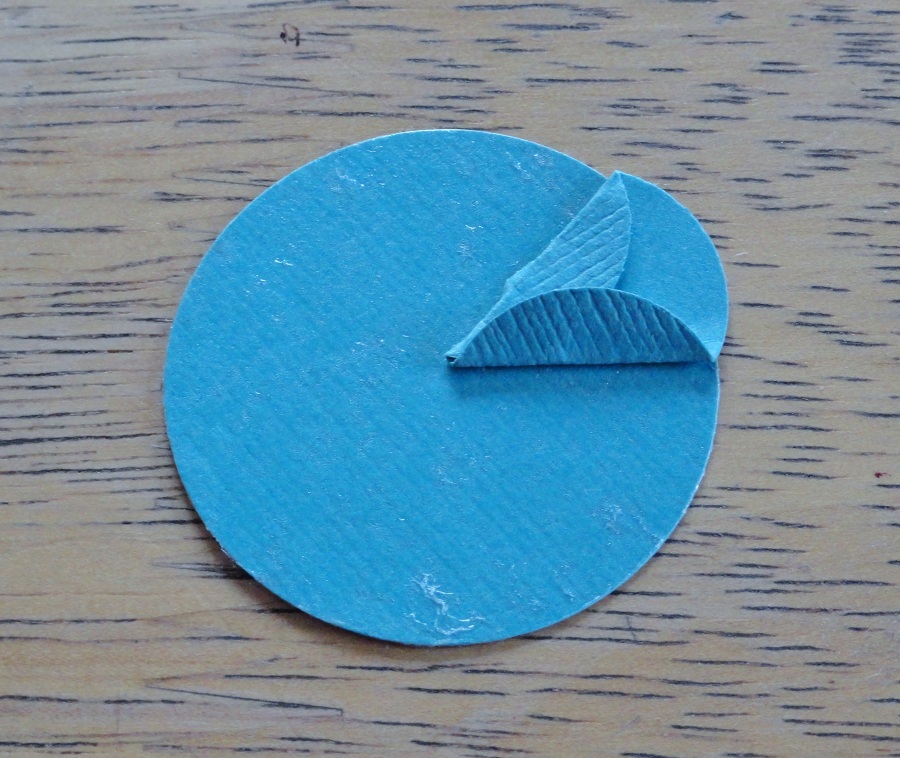
3. Begin folding the petal circles. You will fold each side in so that they come to a point. After you have folded a petal, start adhering them to the base circle, gluing the point as close to the center as possible. If you adhere each as you finish folding them, it becomes easier to see how big or small you should be folding the petals. 


4. Finish your flower with a button, large jewel, or Epiphany epoxy. 
 
 
This tutorial can also be seen on the Pages From the Heart blog. They take some practice but definitely worth it!

XOXO,

Saturday, July 23, 2011

Rosy Rosette Tutorial!

Hey all!

I had a second reveal as a guest designer for this month on the Pages from the Heart blog. This time it was a tutorial for making large rosettes like I did on this banner. There are lots of tutorials out there for making these and here is my take on it. You can check out the original blog post and tutorial here!


1. Cut two strips that are 2 x 12 inches. Using a scoring blade or a scoring board (which I really need to add to my arsenal!), score at every 3/4 of an inch. 


2. Fold the strips at each score line going back and forth. 


3. Glue the two strips together. You will want to glue them so that you have a continuous "mountains and valleys" pattern. You may need to cut a piece off in order to do this. 


4. Now you will need to glue your long strip into a circle using the same technique of having continuous mountains and valleys. 


5. Punch two circles. Using a hot glue gun cover one circle with glue (be careful!) and fold the strip circle inwards onto the circle with glue. It doesn't have to be perfectly centered because this will be the bottom of your yo-yo. You can also use a strong liquid adhesive or glue dots but it may take a few tries to get it to stick. I'm a little impatient so I prefer a hot glue gun which works immediately! 


6. Glue the top circle onto the center of your yo-yo. You're ready to add it to your project!


If you are ever in the downtown Monrovia area stop by the store and check out the projects for this month by the design team. Next week I'll be sharing my last project and a new class!

XOXO,